
“That Said …
I Am So Glad I Did It Myself”!
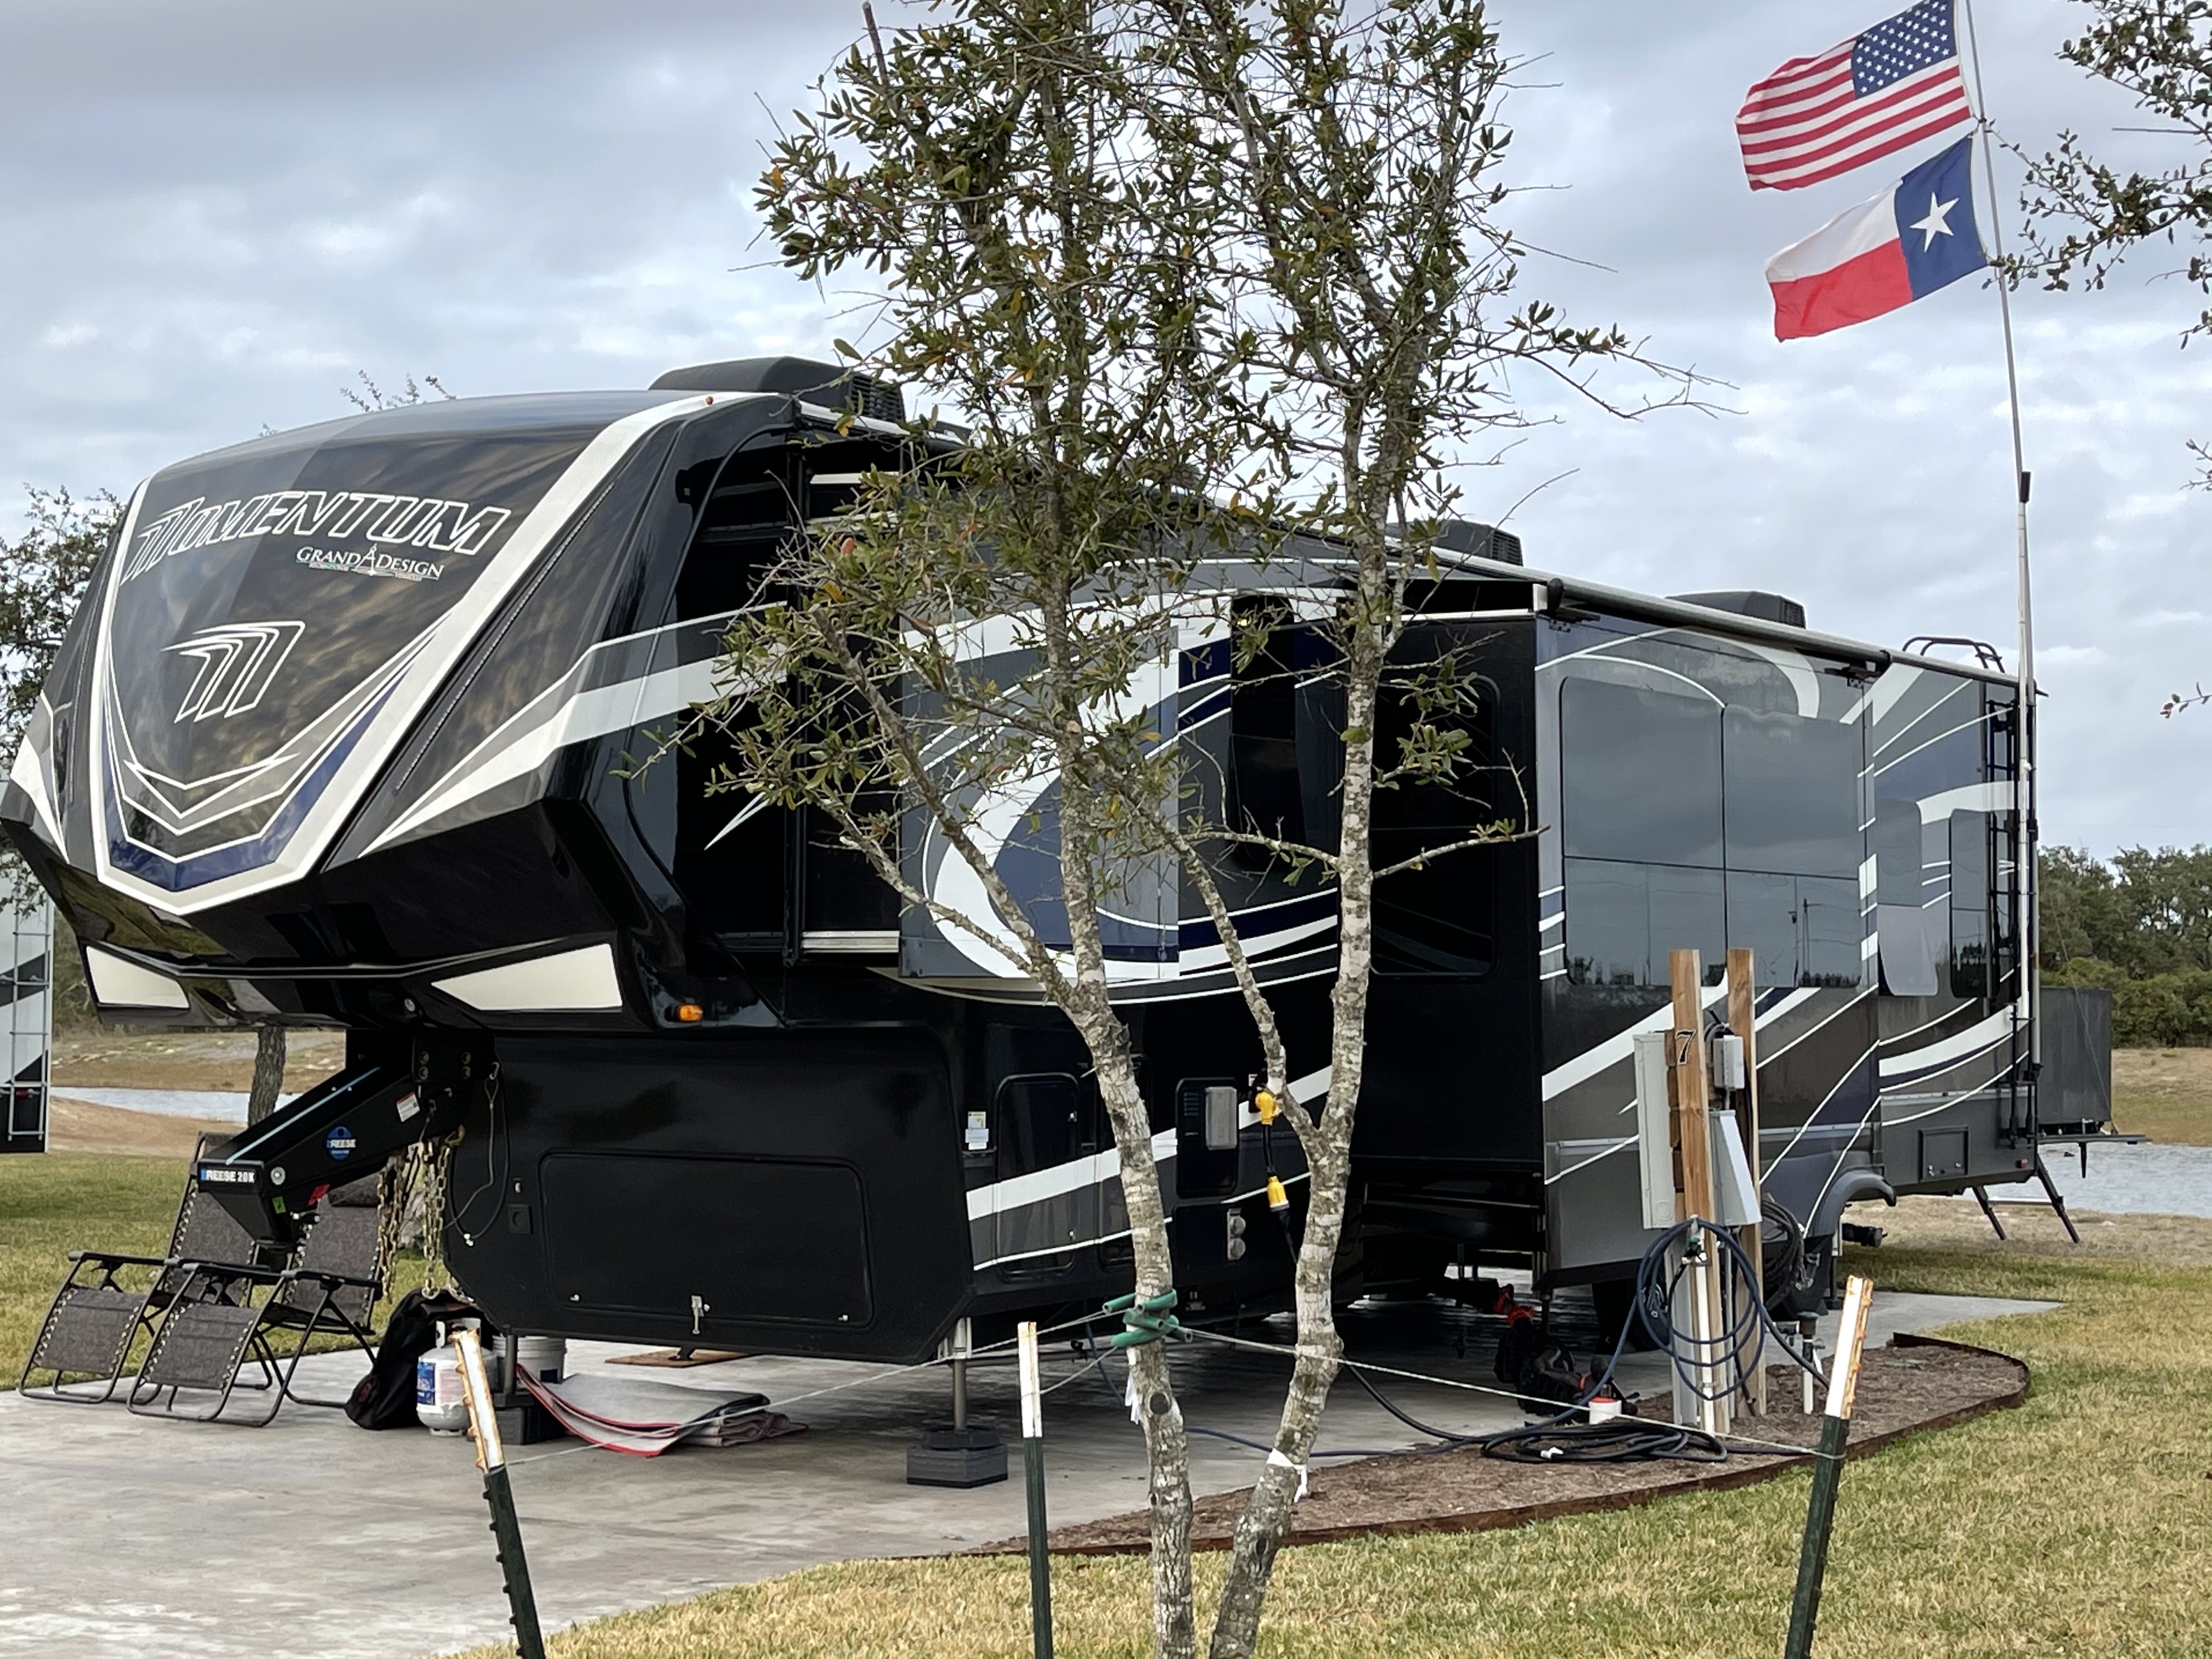
I have wanted to carpet the floor in the garage of our toy hauler since day one but … you know the story! I finally ordered all of the goodies to get it done and still procrastinated by trying to find someone to do it for me. Not because I am not capable, just because I know I am probable going to struggle to walk upright for a week after crawling around on the floor!
Well, I finally did it and I am so glad I did! Not only does it look great, will add some insulation to the floor and gives the office a much more professional working environment look but I can now say “I did this myself”!
So, here are the particulars for those that wanted to know. Instead of listing everything in a Facebook post I thought I would just put it all in one place for ya! Here you go …
- Garage floor space is 10′ x 8′
- Carpet is Traffic Master Wrought Iron Loop carpet tiles from Home Depot. Size of each square is 19.7×19.7 and the job required 2 boxes with 20 squares per box. Note: I have 4 squares left over that I will keep in case we need to replace a square in the future. Click Here to check it out!

- We used Roberts Max Grip 2 sided carpet tape to secure it to the floor and it does a very nice job! Click Here to check it out!
- And, to fill the holes in the floor where the table legs go I used Great Stuff Big Gap Filler! Click Here to check it out!
- And, I bought a Personna folding carpet knife that worked very well! Click Here to check it out!
Installation was pretty simple …

- Raised the desk up out of the way, cleared the floor of all of our “stuff” and then mopped the surface to get it as clean as possible.
- I chose to fill the holes in the floor where the table legs go with the “Great Stuff Big Gap Filler” because they are right where the wheels of our office chair roll back and forth and I didn’t want there to be holes under the carpet. It worked great! I filled the holes and let it set over night. It expanded and dried to fill up the holes perfectly and I simply used a knife to trim off the little bit of excess that mushroomed above the surface of the holes!
- Applied the 2 sided tape to one full box, 20 squares, of the carpet tiles. I liberally applied the tape to each of the 4 corners and added a strip in the middle. Note: Not sure if I would call this a hack but doing this will save you some time and keep you from wasting a good pair of scissors! I took a knife and sawed/cut the tape down to the cardboard center on each side of the roll of two sided tape. This made getting tape off of the roll very easy!!!
- After finishing the prep of the first box I got down on the floor, wearing my NoCry knee pads (these are a life saver all around the rig!) and began in the front left hand corner of the garage floor near the bathroom door and worked my way across and down the garage floor using full sized, uncut, squares. This took one full box and 9 squares out of the second box.
- Now for the uneven cuts! They are actually pretty simple. I cut two 9″ wide strips that ran from the doorway into the living area towards the rear side door. Then came time for the only “notch cut” in the entire installation. This requires a 17″ wide piece of the carpet square with a 9″x10″ notch cut out of it.
- Finishing the uneven cuts down this wall required four more of the 17″ wide cuts of carpet!
- I did choose to run the carpet over the ridge and down the incline of the garage floor with my last row of full sized tiles and add 8″ of additional cut tiles closing the gap between my last full set of tiles and the bottom of the 4 season garage doors leaving about a 4″ gap of the original floor showing. I did this because when we get a really heavy rain on the back doors … it actually rains down inside of the doors and onto the floor. I am hoping, cross my fingers, that this will keep the carpet from soaking up a ton of water.
- One more trip will be required to Home Depot to buy a 3 3/4″ metal threshold to finish off the installation of the floor where it meets the back sliding glass 4 season doors. I think it will give it a better look as well as help with the water problem we have when it rains hard against these back doors!
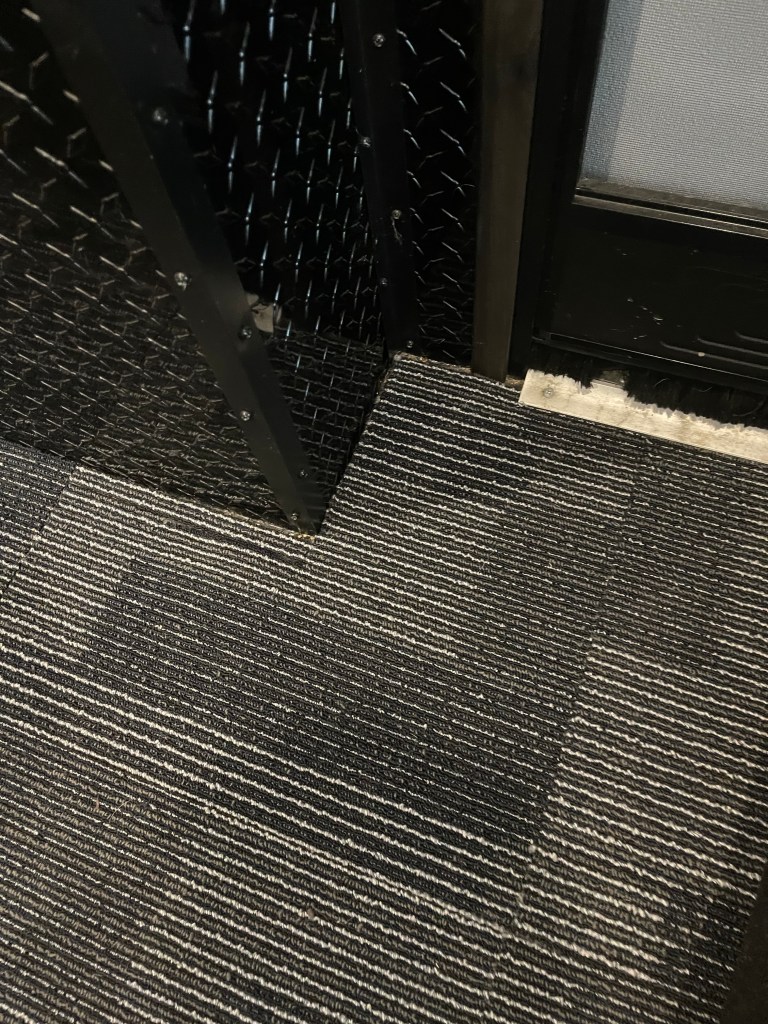
The Only “Notch Cut” Required! 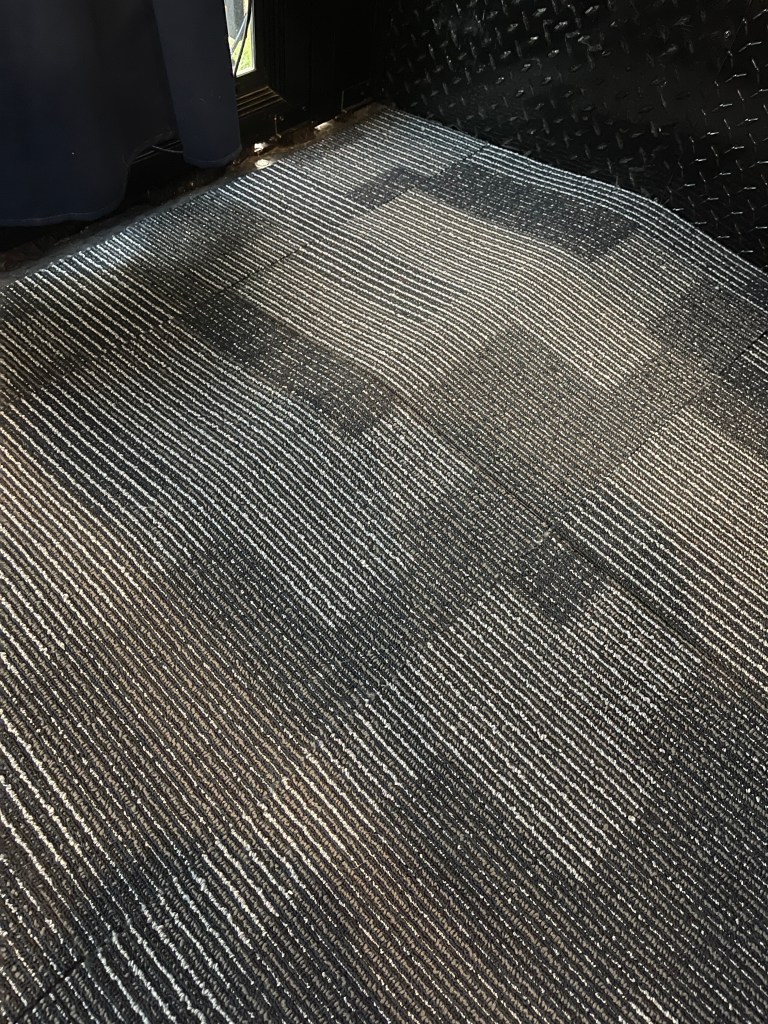
Down the Slope Of the Entrance!
All in all, probably 5 hours of work. Nothing too terribly physical required other than the struggle of getting up off of the floor when it was complete! Gonna need some Tylenol Extra Strength when I hit the sack tonight!!!
Total Cost Less Than $250!
If you have any questions or if I can help you in any way feel free to reach out to me by responding to this blog post, direct message me on Facebook or reply to the Facebook posts where you see this mod covered!
We also invite you to subscribe to the blog to get the latest from Team Jacobus as we live out this dream!
Jim & Christie “Team” Jacobus


One thought on “The One Mod I Put Off Way Too Long!”